Monday, October 28, 2013

Rip offs...can sometimes be a good thing!!

Ok, so I am sitting here beginning to write about one of my favorite things that's taken me awhile to get just right before I could share it with you all! PS, I started this at 8:21pm and now it is 12:02am the next day...clearly I cannot get my thoughts together today. SMH...anyway...

Ever hear of this restaurant called Olive Garden...? Haha, of course you have! I am obsessed with their Zuppa Toscana soup, as well as their salad, breadsticks etc...I have wanted (and tried many times) to recreate this fantastic soup in my home, but it's been surprisingly more difficult than expected. After many BAD batches, burned fingers and finally switching out a few ingredients to make this significantly healthier, I think this one is the golden ticket!

So, read below about MY version of Zuppa Toscana, which is much healthier but equally as delicious, as well as my recipe for homemade Italian dressing! Enjoy friends!

Ingredients:
- 2 small yellow onions
- 1 package turkey sausage (sweet, hot or plain)
- 1 large bunch of Kale
- 5 cloves of garlic
- 3 tbsp olive oil
- 1 tsp sea salt
- 1 tsp black pepper
- 20 oz of chicken or vegetable stock
- 1 quart of water
- 3 Russet potatoes
- 1 cup plain Greek yogurt

Turkey Sausage Seasoning (to make it taste more like the gross sausage. haha)
- 1 tsp dried basil
- 1 tsp cumin
- 1 tsp red pepper flakes
- 1/2 tsp of dried dill (or thyme, or skip it if you don't have any of these..no worries!)

Ok, so here are the instructions...ready?!?

STEP 1: You need to de-case (not sure if that's a real phrase/word or not but oh well...) the turkey sausage. In my case, I got the sweet turkey sausage. They look and taste pretty close to the real dealio but I have added my turkey sausage seasoning above to add more of a kick if you want. To de-case (there's that word again) the sausage, just take the sausage and squeeze it. The meat will come out, probably both ends. And this is where I shall stop the description because this is sounding gross. :-/ Ha!


The kind of Turkey Sausage I get!
Split open the sausage casing and squeeze the contents into a large pot.


STEP 2: Add your chopped up garlic to the pot along with your 3 TBSP of Extra Virgin Olive Oil and start cooking your sausage over high heat and mash up with a potato masher or spatula to break it up. You want it in bite size chunks when it goes into the crock pot. Cook until just done, slightly pink still. 
Add caption

STEP 3: Chop up your yellow onions and add them into the sausage, garlic and EVOO mixture. Add the salt and pepper here as well. Continue to cook over medium/high heat until onions are starting to become tender and all the meat is cooked through. 
Sausage, onions, garlic and EVOO


STEP 4: Add your turkey sausage seasonings. This is an optional step since some people might want a milder flavor. I wanted a true sausage/rich flavoring in mine, so I added the above spices/seasonings to achieve that. You want to make sure not to overcook the turkey since it's so lean. It doesn't have the fat that regular sausage or beef has, which makes it healthier, but also can make it more finicky to cook with. Stir over med/high heat until well incorporated and add into your crockpot. Pull out your bunch of Kale and chop into strips/bite sized pieces. Set aside, you won't use this until towards the very end. 

KALE!!!!!
STEP 5: Rinse out your pot that you had your turkey, garlic, and onions in. There's no need to wash it since we are combining all of these steps anyway :-) Pour 20oz of chicken stock, 1 quart (4 cups for those of you who aren't math wizards haha) and cook until simmering on the stove. Pull out your 3 russet potatoes, wash and dry them and cut them length wise (hot dog way for us that need that visual from elementary school!) and then slice in half moon shapes. I wouldn't go thicker than 1/4 or an inch or so. But honestly, no one will be measuring. Then pop those puppies into the pot of chicken stock and water and cook for 2-3 minutes. 

You can use russet, red skin, or yukon gold potatoes. I like the russet since it's original to the recipe from OG

Half moon shapes baby!

Put them in the hot tub and let them relax for a few


STEP 6: Once the potatoes have relaxed in their hot tub for 2-3 minutes, pull out a strainer spoon and put the potatoes into the crockpot with your turkey sausage deliciousness. 

Strain and add to crockpot. Don't worry, they won't be too delicate to handle

STEP 7: Continue to let the broth cook and add in a cup of plain, greek yogurt. I believe the original OG recipe calls for almost 2 cups of heavy cream...yeah, that's not gonna work for me. So, I've found that plain greek yogurt adds an awesome flavor in place of sour cream, butter, milk and even heavy cream. Not in everything, but in lots of things. Pour that into the simmering pot of broth and wisk your little heart out until it's well incorporated. Don't let it sit too long or it will start to separate. 

I love the meijer plain greek yogurt

Yes, my pots and oven are old. Don't judge. And please don't just plop the yogurt down in there like I did.
You will get burned. And it will hurt. 

Wisk away!
STEP 8: Dang, step 8? Ugh, I promise in real life, it didn't take this long. But I guess when I'm having to write out all my thoughts, steps, processes, rabbit trails and such...it does take longer. :-) I did all of this in less than 30 min...just for those of you that are starting to freak out seeing "STEP 8". Anyway, I digress...Step 8 is pouring the combination of broth and yogurt into the crockpot. Once you pour it into the crock pot give it a stir, turn the heat onto high for 2-3 hours or low for 4-6 hours. 
I like to stir with a ladle at first

YUM!!! Resist the urge to eat this now, let it simmer and cook for awhile first!

STEP 9: Phew!!! Under 10 steps! YES!!!! The last step is to enjoy this amazeballs soup in your favorite white pottery barn bowl, or a sweet dollar store bowl like we do in our house! Haha. 

You guys...I mean, come on....amazing. 

I just died. It's so freaking good. Just try it. And it's WAY better for you! Add some crusty french bread, oh man.

Sooooo....there it is!! There is my finalized recipe for my all time fav soup from the OG. I served this to my family with a salad with iceberg lettuce, croutons and my homemade vinaigrette. Speaking of which, I didn't take pics along the way but my homemade vinaigrette is so good! And it pairs well with the soup too. It has some balsamic vinegar, apple cider vinegar, honey, garlic powder, dried basil, dijon mustard, olive oil, rosemary and salt and pepper. Not sure about measurements, will give those another time!! :-) 

Thanks for reading. Let me know how you like it! 

XOXO
AJ

Saturday, October 19, 2013

Sassy Salted Caramel Corn...yep, it's bad for you...

Welp...October is here. In full swing folks. Yuck. I know I talked about it in my post last week about the cold/cough/allergy/hit-by-a-truck feeling, but oh my goodness has October reared it's ugly head. And please, don't get me wrong, I LOVE fall in the mitten, but the cold and rainy days and nights and minutes are already starting to get to me. :-) I know, I've got a long winter ahead of me.

Anyyywaayyyyy, I wanted to share one of my favorite "fall in the mitten" items to make, salted caramel corn. It's just so freaking good to not share. I've debated about giving out my recipe, but many are similar so I guess it's ok. And as long as y'all will promise to love it and treat it with respect, I'm happy to share. 

My lovely and dear sister, Erin, has taught me how to pop popcorn right on the stove. Please do not insult this delicious recipe by using bagged micro popcorn, gross. Just grab some unpopped popcorn kernels from the store (I got mine from whole foods because my seester told me too) and get to work with a big pot. I didn't do step by step instructions for this because it's that easy. 

1. Grab your pot
2. Turn on your burner
3. Put a tablespoon or so of coconut oil, butter or whatever wets your appetite into the pot
4. Cover the bottom in a SINGLE layer of the kernels
5. Cover and turn the heat to high. If you follow my instructions, you won't have any unpopped kernels. It's amazing. 

It should look like this!! Yummy

Then you have popcorn all ready for the deliciousness that is about to follow...

So, this recipe is a combination of many triumphs, failures and experiments in the kitchen. I am obsessed with caramel corn, but I also love salt...and the stuff I would get around town here just wasn't cutting it. So, I compiled my own. I even compared my recipe to some on Pinterest. Mine seems pretty easy, cheap and fun like many of them on Pinterest. 

Ingredients Needed:
- 1/4C Light Corn Syrup (yes Erin, I know...)
- 1 tsp Vanilla Extract (the real stuff people...the fake crap comes from raccoons bums...I know you don't believe me...look it up)
- 2 tsp Sea Salt 
- 1 C Brown Sugar
- 1/4 tsp Baking Soda
- Popped popcorn (10-12 cups)
- 1/2C or 1 stick SALTED butter
- 2 baking sheets lined with foil
- Cooking Spray

So, step 1/2 is...make sure your family likes caramel corn. I would hate to have you go through all this work only for your family to not like it. :-) Although, that could be good...more for you...?

** STEP 1 **
Step 1: Melt your half stick of butter into a large pot and while you're waiting, preheat your oven for 300 degrees F and line two baking sheets with foil. I'll explain later...

** STEP 2 ** 
Step 2: Add the brown sugar and corn syrup. Stir with a WOODEN spoon.

** STEP 3 **
Step 3: Cook that mixture until it's bubbling a bit. Then decrease the heat so the mixture is simmering and let it simmer there for 4 minutes. Do NOT stir during these 4 min. And please, FOR THE LOVE, do not sit there and try and sniff this delicious smelling concoction...because that my friends, is caramel. It will bubble. It will pop. And we don't have eye washing stations in our kitchens do we? 

** STEP 4 **
Step 4: Yay! Now you can stir it! Continue to cook the golden brown sugary goodness for another 5 minutes or so, stirring often so it doesn't stick to your pan. You'll know when it's done because of the dark golden brown color and amazing smell :-)

** STEP 5 **
Step 5: Now folks, turn off your heat. If you are using an electric stove, please completely remove your pot from the flat glass top or coil burner, or the bottom of your caramel WILL burn. Add the salt and stir. Don't be afraid of how much salt it looks like, this caramel is covering A LOT of popcorn...and the name is salted caramel corn...duh. Along with the salt, add the vanilla and baking soda and combine together. 

** STEP 6 **
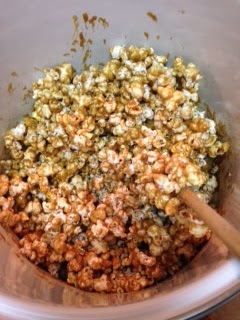
Step 6: Now is the time!!! Add in your beautifully popped popcorn! I just like to pour mine straight in like this...

** STEP 7 **
Step 7: I know you're thinking, "Anna, that's crazy...do a little at a time!" Well, here's the dealio and down low about that...from personal experience, this creates a very sticky and horrible situation...especially for the caramel. :-) It cools off too much and then won't coat the rest. Sad day. So just start folding the caramel over the popcorn. It WILL be sticky, it WILL be thick and hard to stir...but I promise you those sweet and salty little popcorn babies will be worth it. 

** STEP 8 **


Step 8: Many think this is unnecessary but I disagree...I think this step is what makes this popcorn so awesome. You will now spread this heap of sugary popcorn equally between your two lined cookie sheets. Please remember to spray the sheets with the baking spray or you won't be a happy camper.

** STEP 9 **
Step 9: Yeah, sorry that pic is so blurry. I was trying to keep a husband, mother in law, 2 kids and a very eager dog away from this stuff...anyway, last step is to cook in increments of 5 min. This is the step that creates the smooth yet crunchy caramel coating evenly over all popped corn kernels. Just gently stir between timers. I like to do a total of about 15 min, so 3 rounds of 5 min timers...not too shabby. 
And then...it should look like this pic above...

Victory! So so so so sooooo good! It will get stuck in your teeth, you will get sticky hands, have the dog chasing you when you have some in a bowl...but it's worth it! 

I feel that I should give the silly disclaimer of not being responsible for those of you who just don't listen to my instructions and then burn your mouth, fingers or face...so here goes...

** I will not assume responsibility for silliness that causes burns, broken teeth or burned hands **

Ok ok, I'm only half kidding with that statement above. I hope you enjoy!! This is a great gift to throw in with a meal for a friend, family member or family with a new baby. Fairly easy to make, horrible for you to eat but yet so so good. Enjoy!!

AJ


Monday, October 7, 2013

Stop Coughing on meeee!!!!

Oh man! Ladies and gents, it's been awhile....over 6 months in fact! I have had so much going on, good and bad, and this little blog has definitely been on the back burner. But now that I've cleaned other things out of my life I needed my "creative outlet" back again...you know you're excited!! :)

So...in case you haven't realized because of the abnormally warm temps we've been having here in Western Michigan, it's fall people! Time to drag out the leaf garlands, pumpkins, corn stalks, gourds and fall-ish arrangements to spruce up our house!! It's also time to drag out the Nyquil, Claritin and tissues...because yes, fall is upon us....which means cold season is upon us.

Dangit! Just one year I would love to not have day after day after day of runny noses, sneezing, coughing and itchy/watery eyes. And for someone like me with allergies AND asthma...this is not a pleasant sight.

My, now 4 year old daughter Vaelyn, has been down and out with a nasty cold. Coughing, coughing and more freaking coughing. It's going around folks...so if you're reading this thinking "well, I for sure won't get this cold" umm...think again. My kid will probably be the one to accidentally cough on you and share her lovely cold with you. And when you DO catch it, you'll know how much my poor little pumpkin has been suffering. Sneezing a bit, but the cough and itchy throat is what's been bothering her the most. I debated about cough syrups back and forth and I just didn't feel right about putting such strong meds/chemicals in her little body...thought I would try a more natural approach first. I had made something similar about 5 years ago or so, and thought I would experiment with it again and see what happened.

This recipe below is for my homemade cough remedy/cough syrup/allergy relief tonic or whatever you need it to do. It's sweet, all organic and natural and most of all...it tastes good and is GOOD for you. So, without further ado, I will share this wonderful recipe with y'all and hope that it works wonders for you and your family as it has with me and my kids tonight. V hasn't coughed in quite awhile now, so here's hoping! Ok wait....I literally just heard her cough twice as I finished that sentence. Ha! Make me a liar Vaelyn...thanks. :-)

Here are the instructions and recipe for this awesome remedy...

You will need:
- Raw, organic honey
- Coconut Oil (cold pressed, organic)
- Juice from 3 lemons
- 2 jars that close well
- Dried cranberries/cherries (optional)

This is my coconut oil I get from Costco for under $16. AWESOME!

1. Measure 1/4 cup of coconut oil and put it in your pan on medium heat until melted. 


2. Once your coconut oil is melted, add 3/4 cup of organic LOCAL honey. The local honey is so important because that will help build up antibodies in your system against local trees, shrubs, pollens etc that we develop allergies to. Stir together until well blended. 
Local, organic honey to help build up immunity to local allergens

I know this looks gross, but it's how the magic happens

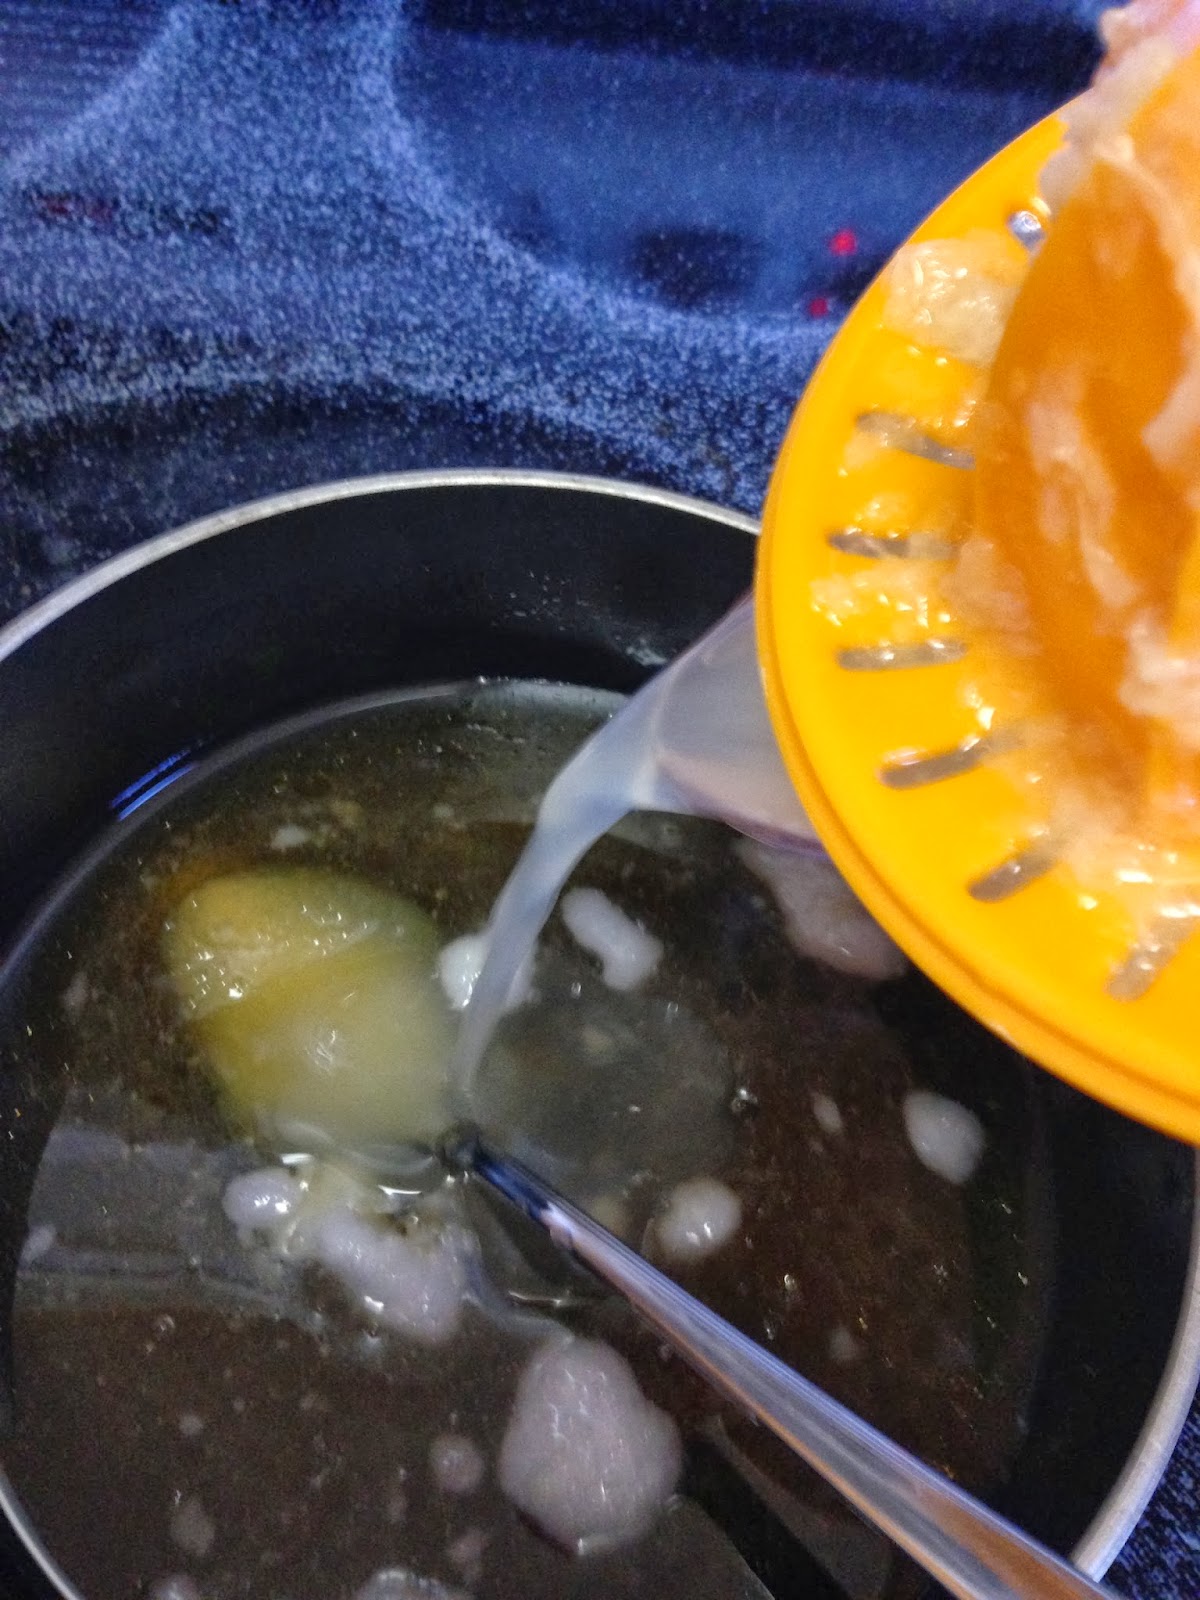
3. Once well incorporated in your pot over medium heat, add the juice of 3 fresh lemons to your honey/coconut oil mixture. Make sure to stir consistently so you incorporate the ingredients together while heating evenly. 
To get the most juice out of a fresh lemon, roll it on the counter like a rolling pin to help loosen up all the juices inside 


4. Continue to stir and blend your three ingredients together until it's steaming and slightly bubbly. Once you start seeing bubbles, immediately remove your pot from the heat and set aside to cool. 
If you do get some seeds from the juice as you can see I did, just strain them out. Or keep them in for some texture!

Perfect heating temperature, this is when you need to remove from heat

Slightly cooled and ready to put into jars

5. Your pot should now look like the above pictured pot while it's cooling. Let it cool for about 5 minutes before transferring it to a well sealed jar for storage. I recommend not keeping it in your fridge longer than 3 months after making it...but it works so well, it'l be gone well before 3 month time has passed! :-) I usually do two different jars of the remedy...one plain and to the other one I usually add a handful of dried cherries or cranberries for extra flavor for the kids. 

"Cherry" remedy

Plain flavored

6. Wait for it to cool, and always shake and check the temperature before serving...especially to children. I like to serve it slightly warm, especially for a sore throat from coughing. You can do a teaspoon or a tablespoon, and take as often as you'd like...because it's made from REAL ingredients. And the best part? It works. 

I like to take a few tablespoons of this when I feel a tickle in my throat, feel a cold coming on, when my allergies are crazy bad, after raking leaves in the cold or sledding in the winter time. It's great to mix into a cup of tea, spread on toast or mix into a steamy cup of hot cider. The reason this works so well for allergies is because coconut oil alone does some amazing things for allergy sufferers. Read about all the awesomeness of coconut oil on this post here. That paired with some local, organic honey? Forget about it. Perfect. :-) Just try it. And for those of you that are eating raw, go ahead and blend all 3 ingredients together in a blender and don't worry about heating it up. It'll be a different consistency but it will still work!! Enjoy! 

Muah!!! XOXO
Anna 


Saturday, February 16, 2013

Yo Ho, Yo Ho, A Pirates Room for Me...

Well, good morning friends! Has everyone recovered from their chocolate overdoses from Valentine's Day? Or for you men out there, have you recovered from your punishment of forgetting V-day?! :-)

Today, I am going to share today about one of my FAVORITE projects/room redoes ever! My son, Maddox's, pirate room! Here we go...

Maddox's room was already a nice beige/khaki color when we moved in, We decided to keep said color on 3 walls. We added multi colored stripes to the focus wall (which is where I was planning on putting his crib and name)...read the tutorial on how to do the perfect stripes here


Once the stripes were done, we decided that we wanted to put his name somewhere on this striped wall. It still (believe it or not) needed something to break up all the bold colors and personalize it to my baby boy. I was at Lowes brainstorming about finding some funky old wood pieces that I could write his name on and hang on the wall. Frustrated and irritated that nothing was grabbing my attention, I walked down a random aisle on my way to the exit and saw it....THE ONE....the exact thing that was in my brain but I couldn't articulate to anyone else. Rope. Awesome, nautical, pirate-y looking rope. I was beside myself with excitement! They sold the rope by the foot...I think it was $0.25/ft...or you could buy a large pre cut amount. I bought 30 ft and it was $4.99. Score! 

Then I started the brainstorming process on just HOW I was going to write his name with this fabulous rope. I thought about hot gluing it...stapling it and even using screws or nails. All of white would've shown through or destroyed the wall. I remembered working on a project for a wall in my master bedroom with pins (which I will share someday) and decided I would try it. Pins are AMAZEBALLS for wall projects/art. They leave tiny holes and go into the drywall so easily. So, I grabbed my little box of flat head pins and a hammer and got to work. I tried to kind of eyeball where to start/finish his name but all in all, it wasn't perfectly centered...which is why I ended up adding the anchor and his middle name. I'm SO glad that it wasn't centered the first time or I never would've added those two things that just make the wall pop. I held the rope on the wall the way I wanted to formulate each letter and put in about 150 or so pins. Isn't it ADORBS?!


Next step was to find some bedding and accessories to complete his little pirate room! I got the striped crib duvet and sheet from Ikea for $4.99. The treasure chest you see in the corner was a steal from Hobby Lobby on clearance for $10! That's his toy box and "catch all". It's so cute and just screams treasures!! On the far wall you can kind of see one of his picture frames. It's a large black piece of wood that is lacquered black with magnetic frames with pics of him, us and our family. There are smaller painted magnets that consist of a wave, sailboat, pirate flag, family sign, treasure map and treasure chest. I got these from a local artists store, Roeda. Check out their website here. Basically, it's painted metal pieces with magnets on the back. Moveable and changeable art. Awesome. 


I decided to hang a basic black shelf for little knick knacks until I finish his pallet wall project. That one is coming soon....I got the little pirate monkey (which started this whole pirate monkey theme) from target on clearance for $1.98..I bought a few of those little guys when Maddox was only 5 months old...I bought them for his 1st birthday party. haha! Plan ahead much?! The "Maddox" wooden name sign is from the Ann Arbor Art Fair from a specific vendor who does these amazing name puzzles, regular wood puzzles and the list goes on. 

Full view!
Cute pirate Octopus from Target!
Fun Coat Anchor Hanger

A lot of these little treasures were from thrift stores or hobby lobby. The mini treasure chest I got from hobby lobby on clearance for $5! I filled it with little gold coins or "gold doubloons" as Vaelyn calls them. The pirate ship up there is the piƱata from Maddox's party. The red nautical jar is from Hobby Lobby as well, as is the anchor coat hanger and material! The key with any kids room is don't be too matchy or get your undies in a bunch if a shade of green doesn't match perfectly. It's what gives a room character. Don't be predictable... :-) For example, the green on Maddox's wall, rug, bedding and chair are all a bit different from each other. 

And....just for fun....some pics of us "pirates"!

L-R Vaelyn, Me and Maddox
Trying out our pirate mustaches for M's pirate party.

Mr. & Mrs. Pirate :-)
Yes, we made everyone get a mustache drawn on them. We are cool like that 

Come on guys....isn't he the CUTEST pirate evah?!

Thank you for reading this novel post....I am THRILLED about how his room turned out. Just wait til you see his new big boy bed in there!! Sad but so fun! Enjoy your weekend mateys! 

Anna and my crew of pirates.


Friday, February 15, 2013

Garbage Monster....

Let's talk about our parents....let's talk about how we always say, "when I grow up I will NEVER do this to my kids!"...let's talk about that first moment as a parent when we hear our mom or dad come out of our mouth....pure awesomeness.

I have had many of the previously mentioned experiences...but this one tops them all...so far anyway! Let's back up about 10-15 years...if you want to know about some of me and my family's back story...ready about us here.

Anywho...do you ever just have THOSE days? Those days where you walk into a room into the same mess that you've asked you family to clean up 1,093 times? Ugh...totally had one of those the other day. My kids and I got home late and it was their bedtime, so we went upstairs to their bedrooms to get them ready for bed. Jammies, cups, diapers, meds etc...but instead...the dreaded garbage monster came out of me...

Oh. My. Soul. There were tears, gnashing of teeth, and lots of crying...after many times of threatening my daughter with the line, "If you don't' pick up these toys I will get a garbage bag and throw them all away!" she was calling my bluff...continuously. In fact, at one time she said, "That's ok momma...I don't want to clean them up anyway...you go ahead and throw them away." Excuse me little girl?! NO WAY. So, I grabbed a garbage bag and literally started to throw toys, clothes etc away into the bag. Let's be real, I didn't ACTUALLY throw them away...but as far as Vaelyn is concerned...they're gone, when really they are downstairs in our basement. :-) Muahaha...

Anyway, if you read our family post you'll know I get this particular trait of a short temper from my dad...so, imagine my complete shock when I hear the exact words I promised myself I would never say, come right out of my mouth so easily...eat crow much?! Sheesh.

Well kiddies, I hope you all are doing well. I really, really, REALLy hope that I'm not the only mom out there that has the occasional garbage monster come out of her.

At the risk of totally embarrassing myself...this was my face most of the night:


Muah!
Anna

Wednesday, February 6, 2013

We Are Family!!!

It's that time!!! I started writing my Garbage Monster post and realized it just wasn't complete without introducing and explaining my wonderful family. So, here we go. Meet the Geldermans'...

Parents: Dawn and Arnie 

Dawn: (aka...mother hubbard, Dawnie, Mom, Neenah, Maja...)

My mom, Dawn, works at a locally owned whimsical art gallery and she is amazing at working with customers and helping anyone and everyone find their "inner artist". Not only did she raise 4 kids but we all managed to survive, be brought to church, eat, have clean underwear, participate in any and all sports that we wanted to and participate in extra curricular activities and spend time with friends. She is/was our mom, confidant, taxi, spiritual advisor and so SO much more. She dealt with me and my siblings, Erin, Peter and Jonathon and somehow (even through all the years of torture) she still loves us AND wants to be around us! Ha! My mom is strong, confident, a wonderful example of a woman of Christ and such an amazing mom, wife, Neenah to my kids and friend to others. :-) I know I will never be able to be exactly like her, but I'm trying my best. I got my spunk, love for cooking, love of decorating, and artsy fartsy side of me all from her.

Arnie: (aka...Arn, Arnoldous, Elder Gelder, Arnie, Dad, Faja, Papa, Bank (haha), Arnold...you get the picture, right?!)

My dad is smart. He knows everything. How he knows everything, I'm not sure...but I'd like the book about "everything". I think I get my love of entrepreneurship from my dad. He has always worked hard to buy and build up his own business. Arn is a civil engineer. I remember as kids while driving, my dad would point out different landfills that he had engineered. I remember him taking us to fly kites on the top of one that he "designed" (designing landfills...crazy!) on the fourth of July and then laying on top of it watching fireworks once it got dark. We thought we were SO COOL because we were VIP at this landfill because my dad was Arnold Geldermans, Civil Engineer. :-) Laugh if you want...but we were landfill royalty. Ok Ok...that's a little much but as a kid I thought it was SO COOL that my dad designed landfills, bridges, parking lots, neighborhood developments etc...My dad is an amazing example of a dad, husband and papa. He is trustworthy, hilarious, great business person and has always pushed us to be our best. I get my temper, drive for owning my own businesses, weird sense of humor and passion for financial freedom from him. :-)

Siblings: Anna, Erin, Peter and Jonathon

Erin: (sorry...not gonna give away her nicknames...too many of our secrets are in those names...)

My BEAUTIFUL sister. Truth be told, growing up I constantly wanted to punch her in the throat for stealing my jewelry, clothes, pencils, cheap make up, shoes (oh wait...she has huge feet she couldn't ever fit into my shoes! ha!) and just my stuff. You know your "stuff" as a teenager? It's uber important and it was obvi I wanted her to leave it alone. I even went as far as putting a lock on my door to keep her out. But, I guess copying is the best form of flattery right?! Anyway, my sister and I are 4 years apart, which proved difficult in ever being truly close growing up. But, as we've gotten older, wiser, more wrinkly and moved out of the same house I can honestly say she is my best friend. She is beautiful, intelligent, so passionate for life/clean eating and making the world a better place. My kids ADORE her, especially Vaelyn, and honestly...when I grow up...I wanna be like her. :-) I really want to be like all of my family...each member for different reasons. So cool how God put our family together. In fact, my sister is coming here tomorrow!!! So...I will probably get in trouble for making fun of her a little bit on here. Oopsie! Love you sister.

Peter: (genius. that is all. well....Pedro is what we call this genius. My kids call him Unky Pete)

The oldest of my younger brothers, Peter is basically a mini-Arn with just a bit more artistic flare. Oh boy....I'm gonna get it for this...but my brother Peter taught me how to knit. He is so creative and secure in himself...I wish I was more like that. He is currently going to Purdue and studying engineering. He is so freaking smart it's scary. You know how people say, "He's a rocket scientist!" I can legit say...my brother, Pedro, is a rocket scientist. He is working for GE Aviation every other trimester and is making a difference in all of our everyday lives. He works on how to make plane engines work better, faster and more efficient. He works on helicopter propellers and how to help them stand up more efficiently to enemy fire...pretty much...he's amaze balls. He is funny, has the same weird sense of humor that me and my dad do. I would say that my dad, Peter and I are the most alike among our family of 6. We are high strung, short tempered, yell a lot and are penny pinchers. haha. Maybe that's why the 3 of us butt heads the most...anyway, Peter always teaches me something new, plays forts and pirates with my kids and is just a big kid at heart....we are just trying to get him to let that kid out a bit more. :-)

And....

Jonathon: (Ron, Jon, J-Boy, JA, Unky Ron...)

The baby. I think Ern (no, that's not a typo, we call her Ern) and Pete would agree...Jon is the baby and that's ok! We always joke that we each kind of represent a different accomplishment or future accomplishment. Apparently, I'm the grandkid-giver, Erin is the amazing artist/nutritionist, Peter is the rocket scientist-smarty pants, and Jonathon is the life saver/future olympic athlete. Jonathon is a swimmer and water polo player just like his big sis Anna was! I'm so proud. :-) He went state for both sports and excelled. He looks like Michael Phelps and if he really wanted to, I know he could've swam and/or played polo for a college team. But, he chose to concentrate on school and I'm so proud of him for that decision. My brother is currently going to WCC in Ann Arbor and is also in an EMT program. He wants to save lives and make a difference. That my friends is a good person. He ALSO is planning on joining the Coast Guard...big sister doesn't like this because it makes me afraid, but my brother is passionate about this and because of that, I (and the rest of us) will support him. My brother Jonathon ranks higher than even me with my kids. Unky Jon plays forts, soccer, "frow" game and all kinds of crazy games with my kids. I am proud of the man he is becoming and what an awesome son, brother, uncle and friend he is to so many people. If he is in your life, you're lucky.

Basically, my family is awesome. Don't mess with us...we stick close together and have each others backs always. I am thankful to the Lord for giving me such amazing parents and siblings. I only hope I can give my kids the same kind of wonderful family dynamic that I had growing up...basically, we need to add 2 more kids to create the ultimate chaos...ready Jeff?! :-) hahaha

You'll hear in future blog posts about all kinds of crazy stuff we did and said and had to wear....for example...my parents always took us on these amazing vacations...one of which was to Sea World. My mom was so paranoid about losing one of us that she made us all dress in khaki shorts and MATCHING bright purple (that's right folks, BRIGHT purple) polo shirts. Gag. But...to be fair, no one got lost...just wet from Shamu. :-) Elder Gelder still wears his purple polo sometimes I think... ;) I WILL find a pic of us in those purple shirts and share in a later post...for now...here we are:

L-R: Anna, Jon, Pedro, Erin, Jeff and V in the middle.
We're cray cray and we know it!

Yup. They're awesome. :-) Papa and Neenah with Vaelyn and Maddox
All in all, I am very blessed and so thankful for every single person in these photos. They are my life. 

Thanks for reading!
Anna and the Gelds family


Tuesday, February 5, 2013

Stripes Ahoy!


So, I have always always always been afraid of painting any kind of stripes...but this time I was willing to try it because I though it would compliment my dream of doing a monkey/pirate room for my little boy, Maddox. :-) 

The mister and I went to work and after some thoughts on "measuring and penciling" stripes and making sure the lines were straight (and my anxiety getting OUT of control thinking about crooked lines) I decided to use something cause a chalk liner to help us have the perfect straight line to use our blue painters tape. 

I am posting pics and directions below as well as things the mister and I realized we should do and should NOT do...enjoy!

Supplies Needed:
- Chalk Line Reel
- Blue Painters Tape
- Measuring Tape
- Pencil
- Current wall paint color
- New paint color for stripes

Step 1: Decide how wide or skinny you want your stripes. I decided to do some different sizes and I decided to do horizontal stripes to make the room seem wider. If you feel like you need to add some height to the room, do vertical. :-) 

Step 2: After deciding how large/small/thick/skinny you want your stripes to be, bust out your trusty measuring tape and measure (for example 12 inches) from the top of the ceiling or previous stripe. Measure and make 3 marks long the wall. 

Step 2: Measure! 
Step 3: After making 3 marking across to make sure your chalk line will be in the right space and straight, take your awesome and amazing chalk line reel (you'll need a helper for this one!) and your helper goes to one side of the room and you go to the other. Both of you hold the chalk reel and make sure the line is taught and lines up with the 3 markings and.....(my favorite part)....SNAP THAT CHALK LINE BABY!!!! It creates this amazing and SUPER straight blue chalk line! Your chalk reel and painters tape will look like this:

       
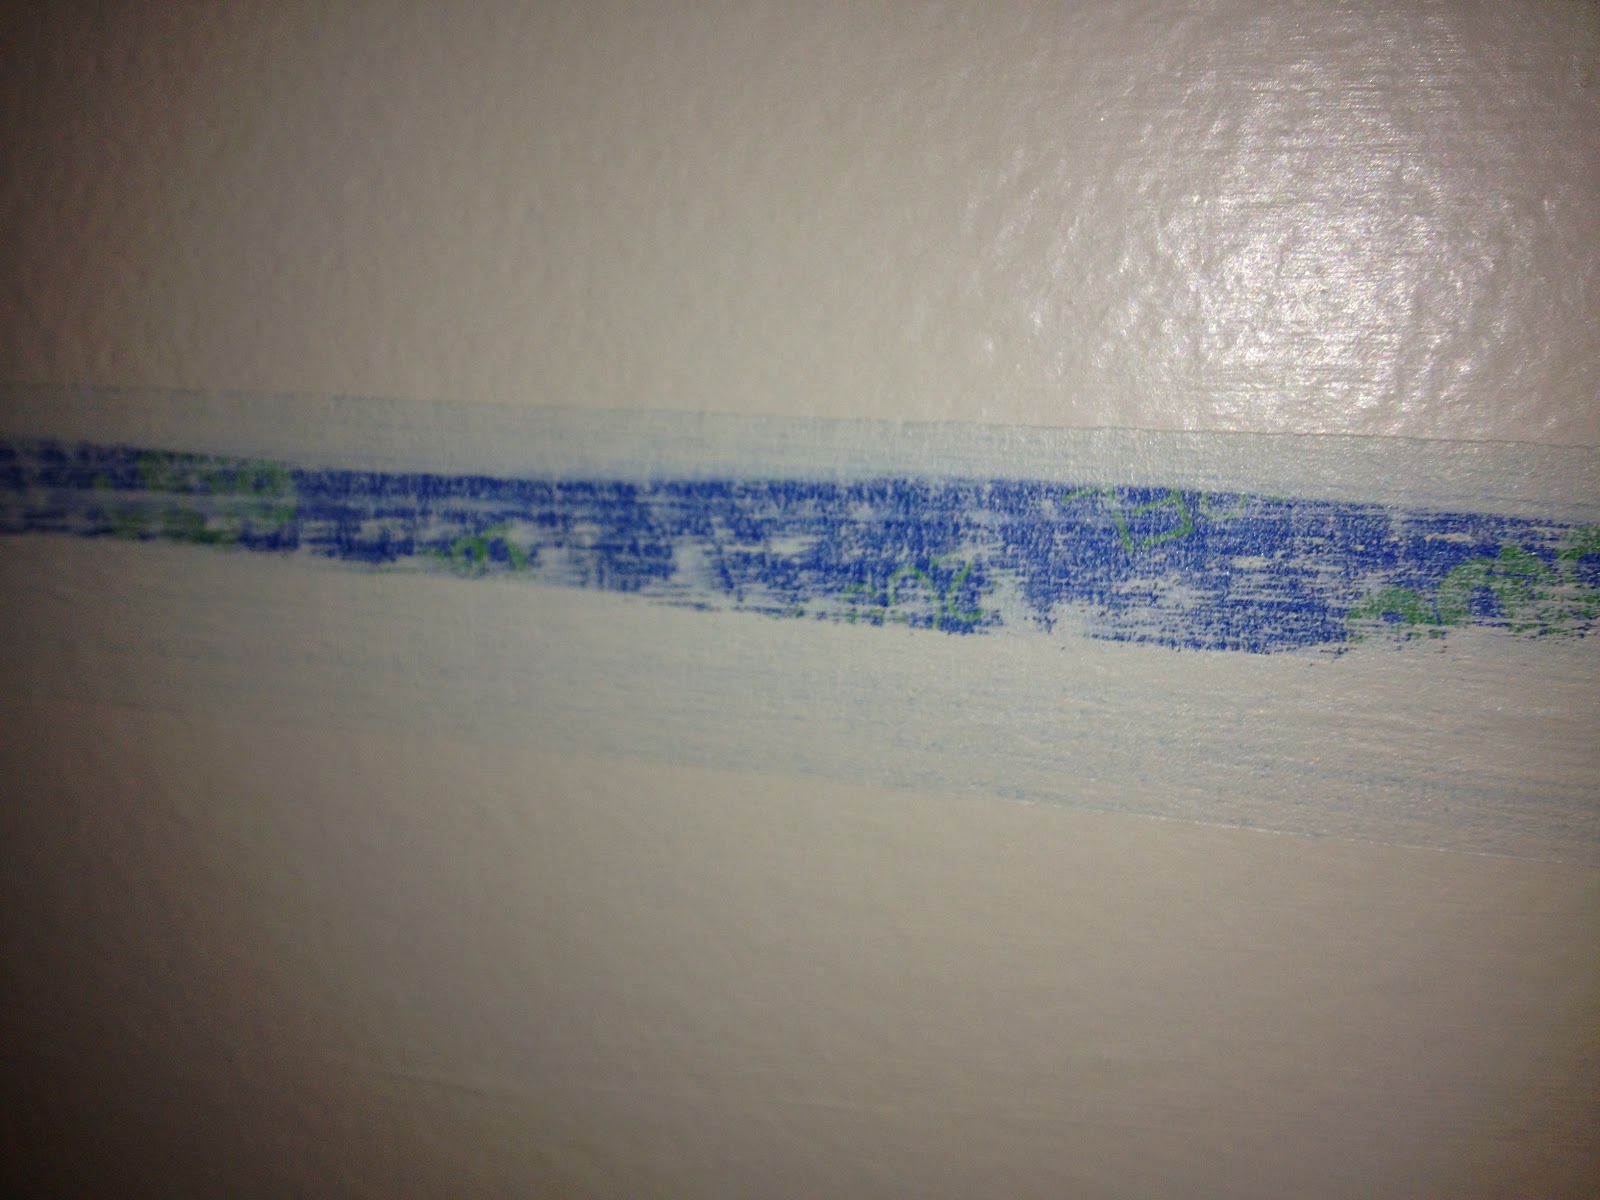
Step 4: After you snap those chalk lines, grab your blue painters tape and SLOWLY and carefully follow the chalk line and press the blue tape against the chalk line. Repeat until all your lines are chalked and taped! After all your lines are taped, take a credit (oops sorry Dave Ramsey...) take your DEBIT card or library card or whatever and smooth out any and all bubbles/lines/snags etc from the tape. This will help ensure smooth, perfect lines. Your tape will now look like this:

Step 4 (my mister is amazing!)
Step 4
Step 5: Here is where your current wall/paint color comes in handy! This may seem tedious and like too much extra work but it makes the WORLD of difference in clean, crisp and perfect stripes! Take your current paint color and take a cut-in brush and brush every single edge of painters tape. What this does is seal the edges of the painters tape where you might have missed. That way any leaks, bubbles or bleeding happens with the current paint color instead of the new one that you'll be painting. This creates the perfect line. Your wall should now resemble this: 

Step 5

Step 5 (looks bad but it's SO good!)
Step 6: Now is the moment!!! It's here!! Time to add your fabulous colors to your stripes!! We added multiple colors and we planned it out ahead of time so we didn't make a crazy mistake the day of! ha! Anyway...I let our paint dry 4 hours before peeling off the tape. When you peel off the tape peel away and down at a 45 degree angle to ensure no paint coming off with the tape. :-) And for the reveal....

Step 6- YAY! 

Step 6 - BOOM! Victory!


So folks...there ya have it!! Fabulous stripes...not too many tears or hair pulling...and his room looks AMAZING!!!! Thanks for reading....I am posting the rest of Maddox's Pirate room reveal in a few! 

Love you all! Muah!

Anna & the Mister :-)