Friday, February 15, 2013

Garbage Monster....

Let's talk about our parents....let's talk about how we always say, "when I grow up I will NEVER do this to my kids!"...let's talk about that first moment as a parent when we hear our mom or dad come out of our mouth....pure awesomeness.

I have had many of the previously mentioned experiences...but this one tops them all...so far anyway! Let's back up about 10-15 years...if you want to know about some of me and my family's back story...ready about us here.

Anywho...do you ever just have THOSE days? Those days where you walk into a room into the same mess that you've asked you family to clean up 1,093 times? Ugh...totally had one of those the other day. My kids and I got home late and it was their bedtime, so we went upstairs to their bedrooms to get them ready for bed. Jammies, cups, diapers, meds etc...but instead...the dreaded garbage monster came out of me...

Oh. My. Soul. There were tears, gnashing of teeth, and lots of crying...after many times of threatening my daughter with the line, "If you don't' pick up these toys I will get a garbage bag and throw them all away!" she was calling my bluff...continuously. In fact, at one time she said, "That's ok momma...I don't want to clean them up anyway...you go ahead and throw them away." Excuse me little girl?! NO WAY. So, I grabbed a garbage bag and literally started to throw toys, clothes etc away into the bag. Let's be real, I didn't ACTUALLY throw them away...but as far as Vaelyn is concerned...they're gone, when really they are downstairs in our basement. :-) Muahaha...

Anyway, if you read our family post you'll know I get this particular trait of a short temper from my dad...so, imagine my complete shock when I hear the exact words I promised myself I would never say, come right out of my mouth so easily...eat crow much?! Sheesh.

Well kiddies, I hope you all are doing well. I really, really, REALLy hope that I'm not the only mom out there that has the occasional garbage monster come out of her.

At the risk of totally embarrassing myself...this was my face most of the night:


Muah!
Anna

Wednesday, February 6, 2013

We Are Family!!!

It's that time!!! I started writing my Garbage Monster post and realized it just wasn't complete without introducing and explaining my wonderful family. So, here we go. Meet the Geldermans'...

Parents: Dawn and Arnie 

Dawn: (aka...mother hubbard, Dawnie, Mom, Neenah, Maja...)

My mom, Dawn, works at a locally owned whimsical art gallery and she is amazing at working with customers and helping anyone and everyone find their "inner artist". Not only did she raise 4 kids but we all managed to survive, be brought to church, eat, have clean underwear, participate in any and all sports that we wanted to and participate in extra curricular activities and spend time with friends. She is/was our mom, confidant, taxi, spiritual advisor and so SO much more. She dealt with me and my siblings, Erin, Peter and Jonathon and somehow (even through all the years of torture) she still loves us AND wants to be around us! Ha! My mom is strong, confident, a wonderful example of a woman of Christ and such an amazing mom, wife, Neenah to my kids and friend to others. :-) I know I will never be able to be exactly like her, but I'm trying my best. I got my spunk, love for cooking, love of decorating, and artsy fartsy side of me all from her.

Arnie: (aka...Arn, Arnoldous, Elder Gelder, Arnie, Dad, Faja, Papa, Bank (haha), Arnold...you get the picture, right?!)

My dad is smart. He knows everything. How he knows everything, I'm not sure...but I'd like the book about "everything". I think I get my love of entrepreneurship from my dad. He has always worked hard to buy and build up his own business. Arn is a civil engineer. I remember as kids while driving, my dad would point out different landfills that he had engineered. I remember him taking us to fly kites on the top of one that he "designed" (designing landfills...crazy!) on the fourth of July and then laying on top of it watching fireworks once it got dark. We thought we were SO COOL because we were VIP at this landfill because my dad was Arnold Geldermans, Civil Engineer. :-) Laugh if you want...but we were landfill royalty. Ok Ok...that's a little much but as a kid I thought it was SO COOL that my dad designed landfills, bridges, parking lots, neighborhood developments etc...My dad is an amazing example of a dad, husband and papa. He is trustworthy, hilarious, great business person and has always pushed us to be our best. I get my temper, drive for owning my own businesses, weird sense of humor and passion for financial freedom from him. :-)

Siblings: Anna, Erin, Peter and Jonathon

Erin: (sorry...not gonna give away her nicknames...too many of our secrets are in those names...)

My BEAUTIFUL sister. Truth be told, growing up I constantly wanted to punch her in the throat for stealing my jewelry, clothes, pencils, cheap make up, shoes (oh wait...she has huge feet she couldn't ever fit into my shoes! ha!) and just my stuff. You know your "stuff" as a teenager? It's uber important and it was obvi I wanted her to leave it alone. I even went as far as putting a lock on my door to keep her out. But, I guess copying is the best form of flattery right?! Anyway, my sister and I are 4 years apart, which proved difficult in ever being truly close growing up. But, as we've gotten older, wiser, more wrinkly and moved out of the same house I can honestly say she is my best friend. She is beautiful, intelligent, so passionate for life/clean eating and making the world a better place. My kids ADORE her, especially Vaelyn, and honestly...when I grow up...I wanna be like her. :-) I really want to be like all of my family...each member for different reasons. So cool how God put our family together. In fact, my sister is coming here tomorrow!!! So...I will probably get in trouble for making fun of her a little bit on here. Oopsie! Love you sister.

Peter: (genius. that is all. well....Pedro is what we call this genius. My kids call him Unky Pete)

The oldest of my younger brothers, Peter is basically a mini-Arn with just a bit more artistic flare. Oh boy....I'm gonna get it for this...but my brother Peter taught me how to knit. He is so creative and secure in himself...I wish I was more like that. He is currently going to Purdue and studying engineering. He is so freaking smart it's scary. You know how people say, "He's a rocket scientist!" I can legit say...my brother, Pedro, is a rocket scientist. He is working for GE Aviation every other trimester and is making a difference in all of our everyday lives. He works on how to make plane engines work better, faster and more efficient. He works on helicopter propellers and how to help them stand up more efficiently to enemy fire...pretty much...he's amaze balls. He is funny, has the same weird sense of humor that me and my dad do. I would say that my dad, Peter and I are the most alike among our family of 6. We are high strung, short tempered, yell a lot and are penny pinchers. haha. Maybe that's why the 3 of us butt heads the most...anyway, Peter always teaches me something new, plays forts and pirates with my kids and is just a big kid at heart....we are just trying to get him to let that kid out a bit more. :-)

And....

Jonathon: (Ron, Jon, J-Boy, JA, Unky Ron...)

The baby. I think Ern (no, that's not a typo, we call her Ern) and Pete would agree...Jon is the baby and that's ok! We always joke that we each kind of represent a different accomplishment or future accomplishment. Apparently, I'm the grandkid-giver, Erin is the amazing artist/nutritionist, Peter is the rocket scientist-smarty pants, and Jonathon is the life saver/future olympic athlete. Jonathon is a swimmer and water polo player just like his big sis Anna was! I'm so proud. :-) He went state for both sports and excelled. He looks like Michael Phelps and if he really wanted to, I know he could've swam and/or played polo for a college team. But, he chose to concentrate on school and I'm so proud of him for that decision. My brother is currently going to WCC in Ann Arbor and is also in an EMT program. He wants to save lives and make a difference. That my friends is a good person. He ALSO is planning on joining the Coast Guard...big sister doesn't like this because it makes me afraid, but my brother is passionate about this and because of that, I (and the rest of us) will support him. My brother Jonathon ranks higher than even me with my kids. Unky Jon plays forts, soccer, "frow" game and all kinds of crazy games with my kids. I am proud of the man he is becoming and what an awesome son, brother, uncle and friend he is to so many people. If he is in your life, you're lucky.

Basically, my family is awesome. Don't mess with us...we stick close together and have each others backs always. I am thankful to the Lord for giving me such amazing parents and siblings. I only hope I can give my kids the same kind of wonderful family dynamic that I had growing up...basically, we need to add 2 more kids to create the ultimate chaos...ready Jeff?! :-) hahaha

You'll hear in future blog posts about all kinds of crazy stuff we did and said and had to wear....for example...my parents always took us on these amazing vacations...one of which was to Sea World. My mom was so paranoid about losing one of us that she made us all dress in khaki shorts and MATCHING bright purple (that's right folks, BRIGHT purple) polo shirts. Gag. But...to be fair, no one got lost...just wet from Shamu. :-) Elder Gelder still wears his purple polo sometimes I think... ;) I WILL find a pic of us in those purple shirts and share in a later post...for now...here we are:

L-R: Anna, Jon, Pedro, Erin, Jeff and V in the middle.
We're cray cray and we know it!

Yup. They're awesome. :-) Papa and Neenah with Vaelyn and Maddox
All in all, I am very blessed and so thankful for every single person in these photos. They are my life. 

Thanks for reading!
Anna and the Gelds family


Tuesday, February 5, 2013

Stripes Ahoy!


So, I have always always always been afraid of painting any kind of stripes...but this time I was willing to try it because I though it would compliment my dream of doing a monkey/pirate room for my little boy, Maddox. :-) 

The mister and I went to work and after some thoughts on "measuring and penciling" stripes and making sure the lines were straight (and my anxiety getting OUT of control thinking about crooked lines) I decided to use something cause a chalk liner to help us have the perfect straight line to use our blue painters tape. 

I am posting pics and directions below as well as things the mister and I realized we should do and should NOT do...enjoy!

Supplies Needed:
- Chalk Line Reel
- Blue Painters Tape
- Measuring Tape
- Pencil
- Current wall paint color
- New paint color for stripes

Step 1: Decide how wide or skinny you want your stripes. I decided to do some different sizes and I decided to do horizontal stripes to make the room seem wider. If you feel like you need to add some height to the room, do vertical. :-) 

Step 2: After deciding how large/small/thick/skinny you want your stripes to be, bust out your trusty measuring tape and measure (for example 12 inches) from the top of the ceiling or previous stripe. Measure and make 3 marks long the wall. 

Step 2: Measure! 
Step 3: After making 3 marking across to make sure your chalk line will be in the right space and straight, take your awesome and amazing chalk line reel (you'll need a helper for this one!) and your helper goes to one side of the room and you go to the other. Both of you hold the chalk reel and make sure the line is taught and lines up with the 3 markings and.....(my favorite part)....SNAP THAT CHALK LINE BABY!!!! It creates this amazing and SUPER straight blue chalk line! Your chalk reel and painters tape will look like this:

       
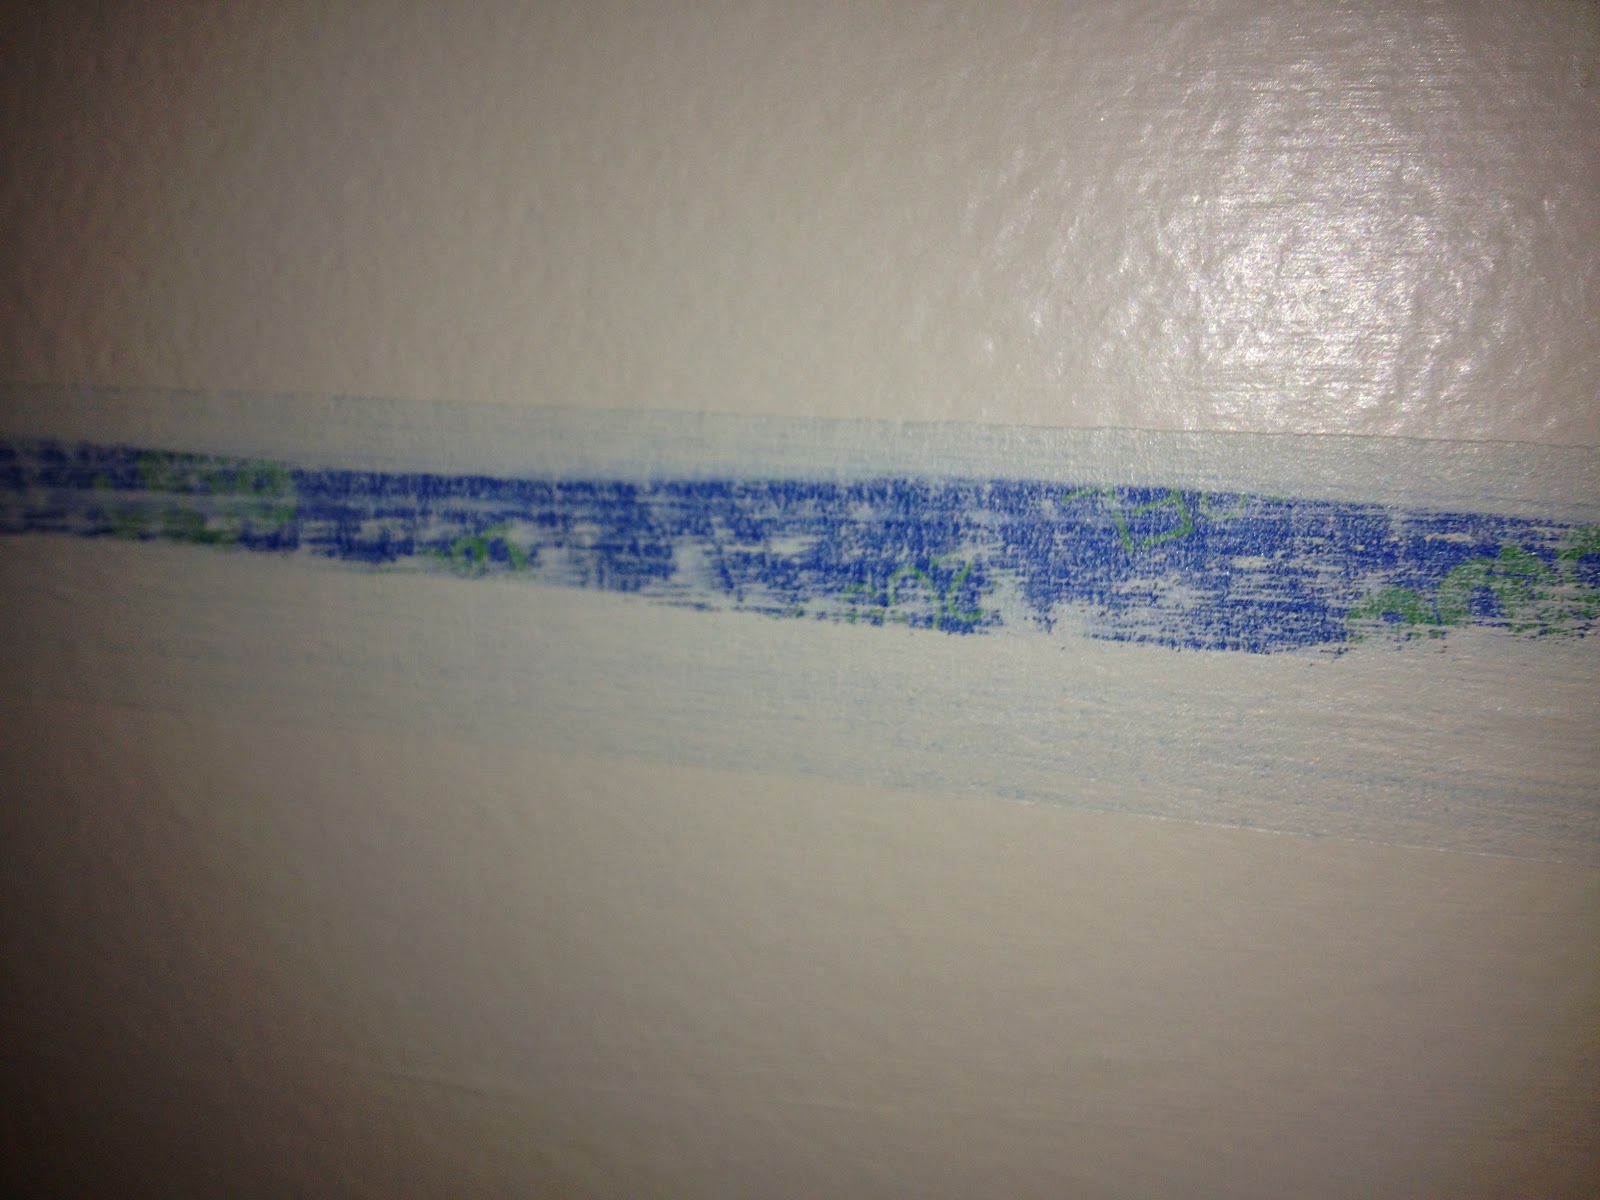
Step 4: After you snap those chalk lines, grab your blue painters tape and SLOWLY and carefully follow the chalk line and press the blue tape against the chalk line. Repeat until all your lines are chalked and taped! After all your lines are taped, take a credit (oops sorry Dave Ramsey...) take your DEBIT card or library card or whatever and smooth out any and all bubbles/lines/snags etc from the tape. This will help ensure smooth, perfect lines. Your tape will now look like this:

Step 4 (my mister is amazing!)
Step 4
Step 5: Here is where your current wall/paint color comes in handy! This may seem tedious and like too much extra work but it makes the WORLD of difference in clean, crisp and perfect stripes! Take your current paint color and take a cut-in brush and brush every single edge of painters tape. What this does is seal the edges of the painters tape where you might have missed. That way any leaks, bubbles or bleeding happens with the current paint color instead of the new one that you'll be painting. This creates the perfect line. Your wall should now resemble this: 

Step 5

Step 5 (looks bad but it's SO good!)
Step 6: Now is the moment!!! It's here!! Time to add your fabulous colors to your stripes!! We added multiple colors and we planned it out ahead of time so we didn't make a crazy mistake the day of! ha! Anyway...I let our paint dry 4 hours before peeling off the tape. When you peel off the tape peel away and down at a 45 degree angle to ensure no paint coming off with the tape. :-) And for the reveal....

Step 6- YAY! 

Step 6 - BOOM! Victory!


So folks...there ya have it!! Fabulous stripes...not too many tears or hair pulling...and his room looks AMAZING!!!! Thanks for reading....I am posting the rest of Maddox's Pirate room reveal in a few! 

Love you all! Muah!

Anna & the Mister :-) 


Wednesday, January 30, 2013

Deceit...

I have had numerous people ask me about how to get their kids, husbands, parents, significant others, sister, uncle, aunt, dog, or donkey (just kidding haha) to eat more veggies, fruits and healthy things. I have been very strict with my kids from day 1 about not making them separate meals or snacks...they eat a lot of raw foods, especially fruits and veggies, and they have grown accustomed to the taste and prefer it now...but, even some of my friends who have tried this with their kids, it still doesn't work. I wanted to share some easy ways and recipes to cut calories, fats and add veggies into certain recipes. The answer to all your problems is deceit. I know, that sounds bad...but sometimes ya just have to trick 'em.

While my KIDS are fantastic eaters of veggies my husband is not...so, at the risk of giving away all my secrets and him saying that they "taste different now" I will share...

Every family LOVES brownies and usually ever family has some kind of sweet tooth in their home. So, instead of adding hydrogenated vegetable oil (which is TERRIBLE for you by the way) and eggs I use 1 can of black beans. I've now since switched to organic black beans, but any black beans will do for now.

Also, every family I know (well, most) eat mac and cheese almost every week. Please, please, please don't feed your kids the nasty chemically enhanced grossness that is the boxed macaroni with POWDERED CHEESE SAUCE. Nasty. Nasty, Nasty. The recipe below for my Mac and Cheese can be frozen in smaller portions so you can pull it out and bake anytime you want some mac and cheese. I know it takes longer to make, but that's only because you're using REAL food and real ingredients.

B3 Brownies

- 1 package brownie mix
- 1 can black beans

1. Open can of black beans and rinse THOROUGHLY in a strainer.
2. Place black beans into a food processor or blender. Add 1 can full of water and puree the black beans. Make sure you really puree them or you'll have nasty chunks of black beans in your brownies.
3. After pureeing your black beans and can of water, mix your dry brownie mix and your black bean goop together and mix well.
4. Pour into a SPRAYED 8x8 or 9x13 container and follow the directions on the box. Everyone's oven is different so the first time you make your B3 brownies you need to watch them.

These are fudgey and delicious and so much better for you than the ones filled with gross fake oils and chemically altered eggs... :-/ If you like more "cake like" brownies add about 5-8 extra minutes onto your baking time.

Superman Smoothie

- 1 cup coconut milk (NOT the milk from the can, the beverage one by the milk section)
- 1/2 cup frozen strawberries/raspberries
- 1/2 cup frozen blueberries
- 1 cup fresh spinach or kale

1. Blend all ingredients together in your trusty blender. Enjoy! This mixture (once blended) can be frozen at a later time if you need to grab breakfast on the go.

We call this the superman smoothie because it has lots of "superman" ingredients. Awesome ingredients that have many antioxidants and powerful super foods like spinach, kale, fruits and coconut milk. The blueberries mask the color and some of the taste of the already mild spinach/kale.

Anna Banana 

- 2 bananas
- 1 cup coconut milk (again, not the canned milk but the beverage milk - in the milk section)
- 3 Tbsp peanut butter
- 1 Tbsp cocoa powder
- 1 cup of kale

Umm...bananas, chocolate, and peanut butter?! YES please! The kale adds so many awesome things and ya can't even taste it! This one is our family's favorite. Tastes so good. :-) You know you wanna try it.

Loaded Mac N Cheese

- 1 lb elbow macaroni
- 1 (10/12 ounce package) frozen winter squash (you should be able to find the pureed one)
- 1 (10/12 ounce package) frozen cauliflower
- 2 cups milk (regular 2 % or I like to use 2 cans of coconut milk to cut the dairy)
- 1 1/2 cups shredded sharp cheddar cheese
- 3/4 cup shredded mozzarella cheese
- 1/2 cup cream cheese
- 1 tsp salt
- 1 yellow onion
- 1 tsp ground mustard powder
- 1/8 tsp ground pepper
- 1 tsp olive oil
- 3 Tbsp Italian bread crumbs

1. Preheat oven to 375 degrees
2. Spray your favorite 9x13 baking dish
3. Bring a large pot of water to boil. Add the elbow macaroni and cook 6-8 minutes until almost done. Drain and let sit in a separate bowl.
4. Put your bag of frozen squash and cauliflower onto your stove in a large skillet and heat over low heat until thawed. Once thawed place into a blender or food processor and puree. Add back into your same skillet (no you don't have to wash it between) and cook together with the milk and onion until onion is tender.
5. Remove the pan from the heat and add your cheeses, salt, pepper, and mustard powder together to make your thick, creamy and vegetable-y (I know that's not a word, but it sounds fun) cheese sauce and pour over your elbow macaroni noodles.
6. Once those are all combined place the ooey-gooey mixture into your 9x13 pan and sprinkle the top with bread crumbs.
7. Bake at 375 for 20 minutes (again, make sure you watch it) and if you need to, broil the top for a few minutes towards the end to brown the top!

Please let me know what you all think of these recipes I've shared with you! More coming soon! Have an awesome rest of your week...and HAPPY HUMP DAY!!

Anna

Yummmmmm......


Monday, January 28, 2013

You put what, where?!

So, my last post was about making homemade whipped body butter with raw, organic coconut oil and Vitamin E oil. You can see that post and directions here. In that post I mentioned how many uses there are with coconut oil...and because I'm cool like that, I'm going to share them with you in this Coconut Oil follow up. :-)

Coconut Oil is something so pure and natural and is so good for our insides and outsides. Most people don't know about all the internal uses for coconut oil...along with household uses. So, without making you wait any longer (I know you're on the edge of your seat right?!) I will share my secrets below. Feel free to comment or add anything that I haven't listed, I love suggestions!

ps...PLEASE make sure to get Organic, Virgin, Cold Pressed Coconut Oil. If you HATE coconut flavor then you can get the expeller pressed coconut oil, however, the regular cold pressed coconut oil is more concentrated and therefore has more benefits. :-)

58+ Uses for Coconut Oil 

Ingesting Coconut Oil Daily can...
1. Help improve mental awareness/alertness 
2. Help alleviate allergy symptoms 
3. During pregnancy help boost good fats for developing baby 
4. Boost hormone production
5. Speed recovery from UTIs
6. Help improve digestion, especially those with a gluten allergy or Crohn's disease. It alleviates pain and tenderness of the insides and will start to heal your body from the inside out. 
7. Helps increase the absorption of calcium and magnesium 
8. Help speed weight loss and metabolism 
9. Be broken down internally as an instant energy source without the calories from fat
10. Help improve cholesterol ratios 
11. Help improve insulin levels 
12. Help increase milk supply in nursing mothers 
13. Support healthy thyroid function 
14. Kill internal parasites or yeast
15. Help reduce/soothe heartburn or nausea when melted in tea and taken internally  

Applying to...
16. Your skin for an everyday, basic moisturizer
17. Your baby's bottom for a natural, smooth diaper rash cream 
18. Teeth along with baking soda for a remineralizing toothpaste (see recipe for that below)
19. Your skin to prevent stretch marks during pregnancy (isn't' that the truth...hate those)
20. As a natural SPF 4 sunscreen (I don't recommend this one. You should always wear SPF 15+)
21. Your babes head to help get rid of cradle cap
22. Any area with a yeast infection... (you can guess which area I'm talking about. ha!)
23. Your body as a delicious and edible massage oil/lotion 
24. Your hands and rub through your hair (small amount for you over doers) to help reduce frizz
25. Lips for a natural and delicious lip balm 
26. Any injury for a quicker healing 
27. On feet for a natural remedy for athletes foot/toe fungus 
28. Nipples for a natural moisturizer during nursing (and great for baby's lips and ingestion)
29. Skin psoriasis patches and eczema for instant relief
30. Skin for a homemade bug repellent 
31. Varicose veins for quicker healing and reducing the appearance of those veins
32. Mosquito bites for reducing the itching sensation 
33. Scalp to stimulate hair growth 
34. Armpits for a natural, aluminum free deodorant
35. Chicken pox or poison ivy to help relive itching 
36. Cuticles to help with nail growth 
37. Cold sores for instant relief and fast healing 
38. Apply topically to help heal yeast infections
39. Perineum after childbirth for quicker healing 

Use Coconut Oil...
40. In all of your favorite stir fry, baking and roasting recipes
41. As a coffee creamer
42. To make homemade mayonnaise 
43. To make your own homemade sugar scrub (recipe below!)
44. As a intense hair conditioner (after washing hair, apply a generous amount and let sit for an hour)
45. As a filling in energy boosting smoothies and shakes
46. On the inside of your nostrils to help alleviate allergy symptoms 
47. Blend a tablespoon into hot tea to help speed recovery from the flu
48. As a replacement for vegetable oils AND butter in any recipe...even on toast!!
49. To help heal a sunburn (only apply after the initial heat is gone)
50. As a natural shaving cream and lotion 
51. To season cast iron skillets
52. To get rid of cellulite (when constantly applied to skin )
53. Inside your children's ears to help heal ear infections quick and easy 
54. To soften and condition shiny leather 
55. To improve sleep when taken daily 
56. As a safe cooking oil for deep frying 
57. As a completely natural baby lotion 
58. Inside a baby's mouth to heal thrush 

There are multiple other uses that I'm choosing not to share because I don't think they are the best options to use for certain conditions. Often Ive had people approach me worried about not liking coconut and taking it internally. A great way to get around this is to melt a few cups of coconut oil and create little "pills" if you will that are easy to swallow and pure coconut oil concentrate. I would make little pills in 1/2 tsp portions. After melting let it come to room temp until it's not in it's liquid form anymore, instead more of a peanut butter consistency. Create the little "pill" balls and put on a parchment lined dish/sheet and freeze. I keep my "pill caplets" in the freezer in an old pill bottle. Easy to take and HUGE health benefits are to gain. 

Recipes

Coconut Oil Sugar Scrub
- 1 Cup Coconut Oil (melted)
- 1 Cup Table Sugar

1. Melt the coconut oil and mix in the 1 cup of table sugar. Feel free to add vitamin E oil and/or some essential oils. Keep in the shower for super smooth legs or for exfoliating the body. 

Remineralizing Toothpaste
- 5 Tbsp Calcium Powder (I buy the bottle of capsules and break them open)
- 3 Tbsp Baking Soda
- 4 Tbsp Coconut Oil (add less or more until you get your desired texture)
- A few drops of essential oil (I like peppermint)

1. Mix the calcium powder, baking soda together until well blended.
2. Slowly mix in the coconut oil until desired texture is reached.
3. Add essential oil drops until desired taste is achieved.

Use as you would a normal toothpaste, or use in addition to your normal toothpaste a few times every week. It's important to remineralize our teeth because of our enamel being broken down by drinks, food etc...and while lots of dentist will tell you that you can't "restore" enamel in your teeth once it's lost, I prefer to believe that our teeth (like many other areas of our body) can heal themselves. Maybe not 100% but I would prefer to put natural ingredients in my mouth and body instead of a fluoride and chemical filled paste that I'm buying from the store. 

I LOVE using coconut oil on a daily basis on toast, bagels, corn...really anything you'd put butter on. I use it in my cakes, cupcakes, frosting, brownies, baking dishes (yes, even the savory dishes). I really think that the flavor of the coconut oil adds so much more flavor than even butter. And don't get me started on using margarine on ANYTHING. Check out this link here about margarine. Pretend you don't want to vom. Sick.

Thanks for reading! Throw out your artificial, plastic margarine! Night!

Anna

Best. Ever. 


Friday, January 25, 2013

Whip it...whip it good!!!

Alright kiddies, much to my dismay...winter IS here. I go through these spurts of loving then hating the snow. I hate driving in it, I have shoveling it but I love watching it fall, especially at night...and I absolutely love the look on Vaelyn and Maddox's faces when they see it falling. With snow and winter comes dry skin. My kids both have eczema, which gets a lot worse in the winter time because of the air in our homes being so dry. I have tried all kinds of medications, creams and ointments to try and fix this problem but nothing works and honestly...I really don't want to put any more medications and chemicals in my babies bodies or on their skin.

I am a HUGE fan of using Olive Oil on our skin to moisturize and clear up dry skin and rashes, but it didn't always work or last as long as I needed it to. So, on advice from my crazy sister (love you Erin!) I bought a large jar of coconut oil from Trader Joes. Not only does coconut oil have healing properties when applied to the outside of our bodies; skin, hair, feet, etc...but also has magical healing properties on the INSIDE of our body. Ok, they're not REALLY magical properties...God gave us so many natural things on this earth to help self-heal, but the results when using these abnormal things seems like magic. :-)

Weird thing about coconut oil is that at room temperature it's a solid. You'd think because it's called "coconut oil" it would be in oil/liquid form, not a solid form like it is. You can get coconut oil at Trader Joes, Whole Foods, Kroger, Meijer, Costco, Sams etc...the list goes on. The best deal I've found is the coconut oil tub from Costco. PLEASE remember, if you're going to be investing in something like coconut oil for your insides or outsides, it needs to be organic, virgin and COLD pressed. This means that it hasn't been altered or has had additives added to it. This is the coconut oil I got at Trader Joes:


Ok, there are so many uses for Coconut Oil this post would be a novel if I wrote them all in here. So I will write a follow up post about all the other fabulous ways to use this amazing, healing and quite delicious product. But, tonight I'm going to be talking about how to make a homemade, whipped body butter from this baby. I used the coconut oil because of it's healing properties, long lasting moisture and it's mild scent. I decided to add some Vitamin E oil to help with additional healing for people with scarring, stretch marks or bad skin psoriasis. The directions with pics are below to help you make your own organic whipped body butter. 


Step 1: Buy the previous mentioned or similar coconut oil at your local grocery store, preferably LOCAL grocery store...don't even get me started on Wal-Mart...


Step 2: Get your Kitchen Aid mixer or hand mixer ready. Along with a large bowl. 

Step 2


Step 3: DO NOT MELT your coconut oil. Keep it at it's solid state. You are going to have to chip away at the oil inside the jar and really use your muscles to scoop it out. It will be thick and chunky like this until you've whipped it for awhile. It almost looks/feels like wax. Don't be alarmed, this is normal. 

Step 3


Step 4: This is where you Kitchen Aid mixer will be a life saver (or muscle rather) because you are going to have to whip the coconut oil solids on high for 7-9 minutes depending on how much you are working with. Once you are about 4 minutes into whipping the coconut oil with your mixer, add 5 Tbsp of Vitamin E oil. This is the Vitamin E oil I bought and used:

Step 4

This is how your whipped coconut oil should start to look like at Step 4, approximately half way through. 

Step 4


Step 5: Keep whipping and every couple minutes stop the mixer and scrap down the sides with a spatula. I mixed mine on speed 8 on my Kitchen Aid. That seemed to work well.  When you're all done whipping the oil in the mixer with the vitamin E oil added, it should look like this:

Step 5
Isn't it BEAUTIFUL?!?!?!?! It's shiny, smooth, moisturizing and best of all, it has so many healing properties for our skin, especially dry skin and for those who have eczema and/or skin psoriasis. 

Make sure to store you new whipped body butter in an airtight container, in a place that isn't too hot or too cold. In a bathroom medicine cabinet would be a perfect spot. I know earlier I talked about people eating coconut oil, which you CAN, but I wouldn't advise eating the body butter because of the Vitamin E oil. 

There you have it folks. It's amazing. When you go to apply it make sure you give it a few minutes to soak into your skin before putting on clothes. And that my friends, is a great way to treat your skin to a natural home remedy. 

Stay warm and safe in the snow! 

Anna


Thursday, January 24, 2013

Oops...she did it again....

So, remember how I told you in my first post that I worked for Mary Kay Cosmetics? Well, if you don't remember, I do. As a result of that, we have a lot of make up and make up "stuff" in our home. And...remember I told you that my daughter, Vaelyn, is very girly? Yup...you get the picture...she gets into "Momma's makeups" quite a bit. But, this time was different....

There are no words. Well, the only words that come to my mind are "lipstick graveyard" and "cream carpet". I can't even describe what it looked like.  I know...you're dreading it already aren't you? You're having flashbacks of some huge mess in your home? Well...this lipstick mural might top them all. Without further ado...here is the pic of "the mess":


I know, right?!?!? You can feel the anger welling up can't ya? Your blood is starting to boil...you're getting your spanking hand or "time out" area ready...oh yes. Mary Kay just came out with some new True Dimensions lipsticks, which are FABULOUS (I have to give a shameless plug in right?!) and the color stays on for a long time and it never dries out. So, you can imagine how irritated I was to represent such a fabulous product when it was now going to be worn for "long periods of time" on my CREAM CARPET!!!! 

All kidding aside, I love Mary Kay and their products are great. Good quality and because they are made of good quality ingredients, they are tough to get out. I did a little bit of research about lipstick and carpet after I calmed down...which, let's be real...I still am not totally over it. In fact, I texted Jeff the picture above and he was scared of me 30 miles away at work! ha! To answer the obvious question, yes my children survived...but there were spanks, timeouts, tears and toys taken away for punishment. After some research, I finally came up with some ideas of how to cut the stain and lift it out. Ready??

This is kinda the fun part. Creating cleaning solutions, especially ones you concoct yourself, is so cool, it's like being a magician...ok, not really...more like a scientist. My chemistry teacher from high school, Dr. Elias, would be proud to know that I really was listening and learning my periodic table while passing notes. :-) And to my parents (who I know are reading this), yes, I passed notes. But ha ha, you can't ground me anymore! For those of you that followed that rabbit trail, I figured that since lipstick has oil in it, "washing" or blotting the stain with water wasn't gonna work. Remember in 2nd grade, the oil/water experiment? Oil and water don't mix. So dish soap was the obvious choice. It's a grease/oil cutter. That was my first ingredient. Now, you're gonna be shocked, but half way through I realized how fortunate I was to have cream carpet...because I could add a tad of bleach to help pull out the rest of the stain. So, dish soap, bleach and I added hydrogen peroxide for lift and a bit of laundry detergent for extra stain fighting power. I will list the entire recipe below. Please please please, don't put this on a HUGE area of carpet in your house until you try it on a small part first. And please don't disregard this warning like you do with other carpet cleaners that you buy at the store. :-)

And...for the end result:


BOOM!!!

By NO MEANS is this perfect...there is still some residual lipstick stains, but I think it worked awesome. Jeff says that now I should be able to laugh about it...but I'm not there yet. The worst part? 3 whole lipsticks wasted!! Rats! 

And for those of you who want to lecture me (like my mother) about "well, you shouldn't leave your stuff out for the kids to play with..." I have two words for you... I. DIDN'T. My kids went upstairs into our master bedroom, into our master bathroom, Vaelyn stood on a stool and got my make up case off the top of the counter. And...the rest is history... 

before
after

 BOOM again!!!!!! I'm SO proud!!!! 

MTAH Carpet Cleaner
- 1 pint hydrogen peroxide
- 1 Tbsp of bleach (OR Borax if you don't have a color carpet that will work with bleach)
- 1/8 C laundry detergent
- 1/8 C grease cutting dish soap
- baking soda for sprinkling 

Mix together, and if it isn't "watery" enough, you may add a bit of hot water to the mixture, just don't put too much water or it will just spread the stain around. 

Blot the stain (for the love people, DO NOT RUB the stain) with a clean cloth. Not a paper towel. Not a wet washrag, a clean, dry cloth. Add some pressure and pull up as much of the stain residue (in my case lipstick) as possible. Then dip another clean cloth into your cleaner and press down on the stain until it starts to lift. Try to clean the stain as soon as possible after it happens so that it doesn't sink into the fibers even more. After most of the stain is lifted, sprinkle the area with baking soda. Let it sit until it's dried and then vacuum up. It helps pull any smell (perfect for pet stains) out and any extra color as well as the moisture so you won't get a mildewy smell. 

Thank you for reading this novel and listening to me whine about my lovely, sweet children destroying my carpet. :-)

Anna